
Valves are critical control points in any water distribution system. Regular valve exercising keeps these critical components in working condition and ensures you can isolate areas quickly during leaks, line breaks, or emergencies. For small systems with limited resources, developing and maintaining a basic valve exercising program will extend valve life, improve emergency response, and maintain reliability. A proactive exercising program keeps valves operational, reduces repair costs, and ensures quick response during emergencies like water main breaks. Follow these steps and best practices to create an effective valve exercising program in your system:
1. Take Inventory
Begin by identifying all the valves in your system. Catalogue them including size, type (gate, butterfly, etc.) and installation date:
- Gate valves
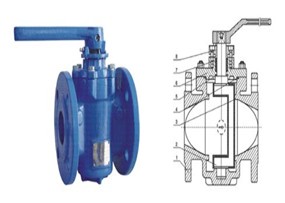
- Butterfly valves
- Main line shutoffs
- Zone isolation valves
Create or update a valve map using GIS, a spreadsheet, or simple paper maps. Include:
- Valve ID/location
- Size and type
- Date last exercised
- Any issues found
2. Set a Realistic Schedule
Aim to exercise all system valves every 1-2 years, but start small. For example:
- Year 1: Target 25% of your system (by zone or valve count).
- Quarterly: Exercise a handful each month to spread out the work.
- Prioritize critical valves near facilities like hospitals.
3. Use the Right Tools
You’ll need:
- Valve key or operating wrench
- Lubricant (if specified by manufacturer)
- Valve box cleaner (for clearing debris)
- Torque wrench (for large or sensitive valves)
4. Follow the Proper Technique
Valve exercising requires more than just giving it a quick turn. Keep these points in mind to ensure safe and effective valve exercising:
- Operate slowly and steadily – Avoid rapid turns that can cause water hammer or main breaks.
- Cycle fully, then back off – Open the valve completely, then turn it back about ¼ turn to keep it from seizing in the fully open position.
- Track movement – Count the turns from open to closed and compare against system records.
- Monitor performance – Pay attention to grinding, sticking, or unusual resistance.
- Don’t force it – If the valve resists, stop. Record the issue so it can be repaired in the future.
5. Inspect and Record After exercising:
- Check for leaks or signs of corrosion.
- Clear any debris in the valve box.
- Update your valve records (manual log or software).
- Keep records of valve issues to plan for future budget requests and rate increases.
Track:
- Date of operation
- Condition of the valve
- Number of turns
- Any maintenance needs
Good records help justify budget requests and track performance over time.
Tips for Success
- Exercise valves during low-demand periods to avoid pressure issues.
- Combine with hydrant flushing to maximize efficiency.
- Communicate with customers if work may affect pressure or water quality.